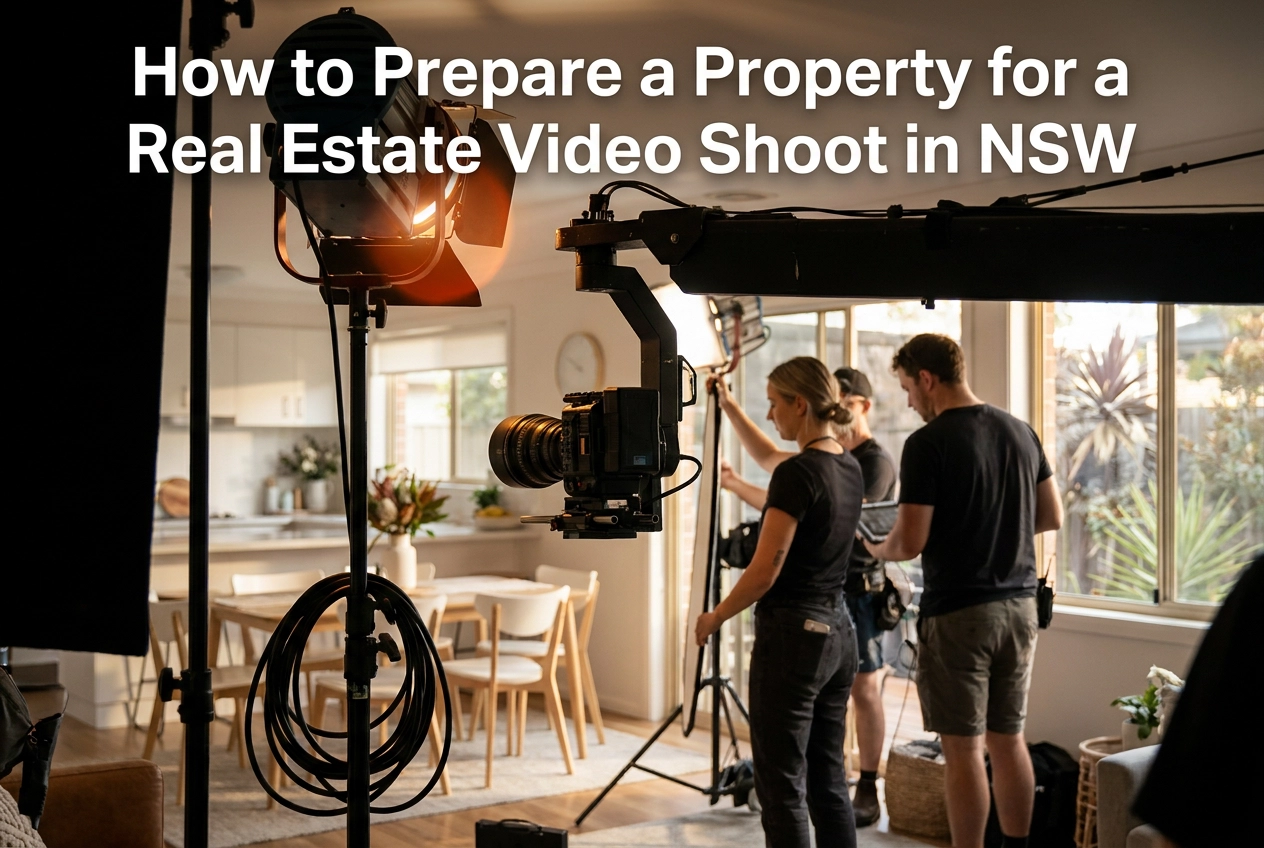
You could invest in the best camera gear on the market, hire an experienced crew, and book a perfect Sydney morning with golden-hour light. But if the property isn't prepared, none of that matters.
This is the reality that experienced agents in the real estate videography Sydney market already know: a production crew can only shoot what is in front of them. Closed blinds, cluttered benchtops, and a wheelie bin sitting in the driveway don't disappear in post-production. They show up in every frame and quietly undermine a listing that deserved better.
The good news is that preparation is entirely within your control. Unlike weather, traffic, or vendor moods, a structured pre-shoot checklist is something you can execute consistently, every time, for every property.
In this guide, you will find a practical room-by-room walkthrough covering everything from curb appeal and kitchen surfaces to your final morning protocol before the crew arrives. Whether you're briefing a vendor for the first time or refining a system you already use, this checklist will help you get more out of every shoot.
According to the National Association of Realtors, listings with video receive 403% more enquiries than those without. That figure assumes the video is doing its job. A video that undersells the space does not deliver that result.
Professional real estate videography uses mirrorless cameras and wide-angle lenses in the 16-24mm focal range. Those lenses make rooms feel open and expansive, but only when the room is ready. The same optical properties that make a clear kitchen look generous make a cluttered one look chaotic. A few items left on a benchtop become the dominant visual in a wide shot. The lens does not discriminate.
A poorly prepared property creates a further problem: revisit requests and reshoots cost time and money and delay the listing going live.
Preparation sits entirely within your control. Not the camera, the crew, or the edit. See what we deliver on a real estate shoot and you will understand why property condition on the day determines the ceiling on quality more than any other single factor.
Most vendors have never been on a working video set, so telling them to "tidy up" produces a tidy-in-their-eyes result that still derails a shoot. Translate production requirements into plain language before the crew arrives.
Core briefing points: remove personal photographs and highly personal items from every room (they pull focus and make it harder for buyers to picture themselves in the space), clear every horizontal surface, and confirm all light globes are working. A blown globe in a downlight cluster creates a visible gap no edit fixes.
Confirm the vendor will be off the property during the shoot. A person moving through the background makes that footage unusable. If they cannot leave, they must stay completely out of all sightlines.
Ask them to move all vehicles off the driveway before the crew arrives, not when called. Cars moved mid-shoot eat into paid production time.
For morning shoots, ask vendors to open all blinds and curtains the night before. The crew should walk into a naturally lit space from minute one.
A verbal briefing three days out is close to useless. Send a written summary by SMS or email the evening before. If you want a structured starting point, The Final Step Before Booking Your Shoot is worth a read before confirming your schedule.
Once the vendor has their instructions, shift your attention outside, because the exterior is where the shoot actually starts.
Drone footage is standard on professional real estate shoots now. Drone equipment used on professional NSW shoots captures 4K aerial footage that shows the roofline, driveway, garden, and streetscape in full detail, which means anything left out there will be visible. There is nowhere to hide from 30 metres up.
Mow lawns and edge garden beds the day before, not the morning of. Freshly cut grass is often wet, and disturbed soil and clippings show up in frame. The day-before timing gives everything a chance to settle and dry.
Walk the property and remove bins, garden hoses, children's toys, and any temporary structures like portable clotheslines from all areas visible from above. Then sweep the driveway and front path, wipe down outdoor furniture, and check for cobwebs around the front entry and eaves.
In many NSW coastal and high-humidity areas, rendered walls, timber fencing, and outdoor furniture can carry mildew or water stains that are barely noticeable in person but become the centrepiece of a wide exterior shot. A quick clean the afternoon before the shoot handles it.
If the property has a pool, remove the cover, clear the water, and store any pool equipment out of frame before the crew arrives.
Once you move inside, the living area is where the video wins or loses the buyer. Because the crew is already working with a wide field of view, every horizontal surface needs to be treated as foreground.
Clear every horizontal surface: coffee tables, side tables, entertainment units. Straighten cushions but keep the arrangement simple. An over-styled cushion stack draws the eye to itself rather than the room's scale, which is what you are selling.
Lock in lighting before the crew arrives. Open every blind and curtain fully. Natural light helps a production crew balance interior exposure without artificial rigs, which add time and rarely look as good. Turn on all ceiling lights and floor lamps. The combined effect helps the camera manage dynamic range between a bright window and a darker interior wall.
Finally, walk the sightlines. Freestanding fans, exercise bikes, and storage boxes that have drifted into the living area interrupt visual flow. Move them before the crew arrives.
If you want to map out what you need delivered from the shoot, the What do you need delivered? calculator is a useful starting point.
The same optical principle applies in the kitchen with particular force. Shot from the doorway or island, the lens captures the entire benchtop in a single frame, so the kettle, toaster, knife block, dish rack, and fruit bowl you left out are not background details. They are the shot.
Clear everything that is not built in. Wipe down benchtops and splashbacks thoroughly; grease marks and water stains become obvious under camera lighting in a way they simply are not to the naked eye in normal conditions. The same goes for the fridge front: remove magnets, notes, and children's artwork, and make sure the sink is empty.
Glass-fronted cabinets need attention too. Cluttered shelving behind glass reads exactly as cluttered on screen. Either tidy the contents into a simple arrangement or use a consistent colour grouping to reduce visual noise.
Finally, switch on any under-cabinet lighting and island feature lighting before the crew arrives. These light sources add warmth and depth that cameras respond to well, and they take about ten seconds to turn on. Understanding how to manage camera placement without distracting the audience is the crew's job; giving them a clean, well-lit kitchen to work with is yours.
Bathrooms are technically demanding out of proportion to their size. Mirrors, tiles, and chrome fixtures reflect everything, including the camera, crew, and any gear in the frame. A skilled real estate videographer works around this, but cannot fix a reflection containing a shampoo bottle forest on the shower ledge.
Clear every personal toiletry from the vanity top, shower ledges, and bath surround. Shampoo, conditioner, soap dispensers, razors, toothbrushes, all of it goes under the sink or into a bag. A single folded towel hung neatly on the towel rail gives the camera something clean to anchor on and reads far better than a fully stocked bathroom that looks lived-in rather than presented.
Close the toilet lid. It is the most overlooked detail in bathroom prep and one of the first things viewers notice in footage.
Clean the mirror and glass shower screen until streak-free. Streaks catch light at every angle and will show in the edited video regardless of how the shoot is lit. This connects to a broader principle around how technical decisions during production affect the final result.
Turn on every vanity light and feature light before the crew arrives. Bathrooms without natural light need all available sources active from the start.
Bedrooms move faster than bathrooms, which is exactly why they get rushed. That pattern shows up in footage more than agents expect.
Start with the bed. Fresh, well-fitted linen with no visible wrinkles is the baseline. Mismatched or creased bedding reads as neglect on camera and anchors a buyer's impression of the room.
Clear the bedside tables completely: water bottles, charging cables, medications, books, all of it. A bare surface photographs as intentional; a loaded one photographs as someone's bedroom rather than a property for sale.
Open every curtain and blind fully. Catching strong directional light is an asset; blocking it forces the camera to compensate and flattens the room.
Check the chair, the back of the door, and the floor. One item of clothing draped over a chair is reliably what a viewer notices and remembers. It takes ten seconds to remove.
Finally, look under the bed. Storage boxes or bags extending past the bed base into open floor space will appear in the frame. Move them before the crew arrives. What can speed things up on shoot day is almost always preparation done the day before, not the morning of.
In Sydney, outdoor living areas are typically a strong buyer priority, and a neglected alfresco area or deck does real damage in a walkthrough video.
Set outdoor furniture as if someone is about to sit down. Chairs pulled out, cushions on the seating, umbrella open if the weather allows. This takes five minutes and communicates a lifestyle rather than a storage problem.
Pull the cover off the BBQ and give it a quick clean. Covered and grimy reads as a maintenance issue on camera. Uncovered and clean reads as a living space.
Check any outdoor lighting before the shoot, especially if the schedule pushes into late afternoon. String lights and feature garden lighting that work make a real difference in footage quality.
Walk the perimeter and check the fencing and gate hardware. Loose or damaged fencing shows clearly in wide exterior shots and drone footage. Remove dead plants, empty pots, and garden waste from visible areas. One dead plant in an otherwise tidy garden becomes the thing buyers remember. The camera finds and holds whatever you leave in frame.
With the outdoor areas confirmed, turn your attention back inside.
Arrive at the property at least 30 minutes before the crew. This is not the time to be doing preparation; it is the time to confirm it is done. Walk every room with your checklist in hand.
Work through the property systematically: every light on, including bathrooms, laundry, and any secondary living spaces that are easy to forget. Then check every blind and curtain. Vendors sometimes re-close blinds for morning privacy -- check every window.
Step outside for a final exterior pass. Bins off the street, cars out of the driveway, nothing in the garden that was not there the day before.
When the crew arrives, give them a two-minute verbal brief on any property quirks: a room that catches direct glare at a certain time, a light that flickers, a door that needs to stay closed. A real estate videographer with accurate information about the property works faster and makes better decisions about angles and timing.
After that, stay available but give the crew room to work. They will ask if they need you.
618 Media is a two-person NSW crew covering Sydney and NSW, and every real estate shoot is handled end-to-end by the same people who edit the footage. The person holding the camera already knows what they need to capture, so there is no brief being handed to a separate edit team who wasn't there.
Packages cover walkthroughs, drone footage, and lifestyle content. Pricing is estimate-based and available through the online Video Project Calculator before any call is needed, so you can gauge cost on your own timeline.
A well-prepared property removes the conditions that cause revisit requests -- once the shoot wraps, the edit can proceed without waiting on a second visit to correct avoidable gaps.
For agents new to working with a real estate videographer in Sydney, preparation expectations are built into the booking workflow. You will know what is needed before shoot day, not when the crew is already at the door.
Here is everything from this guide distilled into a single reference you can screenshot, print, or forward to your vendor before every shoot.
Vendor briefing Brief 48 hours out; send a written confirmation the night before.
Exterior Lawns mowed and edged the day before, driveway clear of all vehicles, bins away, pool clean with cover removed, outdoor furniture arranged and wiped down.
Living areas All surfaces cleared, every light on, blinds and curtains fully open, sightlines through the space unobstructed.
Kitchen Benchtops completely clear (kettle, toaster, dish rack, all of it), surfaces wiped, fridge front cleared, feature and under-cabinet lighting on.
Bathrooms Toiletries removed from all visible surfaces, clean towels folded on rails, mirrors and shower screens streak-free, toilet lid closed, all lights on.
Bedrooms Beds made with fresh linen, bedside tables cleared, curtains and blinds fully open, floor completely clear.
Outdoor areas Furniture set and ready to use, BBQ cover off and unit clean, dead plants and empty pots removed, any feature or string lighting confirmed functional.
Morning of shoot Arrive 30 minutes before the crew, walk every room against this list, and give the crew a quick briefing on any quirks: a room with glare at a specific time, a light that plays up, a door that needs managing.
For agents running regular real estate video production across NSW, this checklist is not overhead, it is quality control. The one time it prevents a revisit shoot, it has paid for itself many times over.
Property preparation is not a courtesy to your photographer; it is a direct investment in the quality of your listing and the speed of your sale. The agents who consistently produce strong real estate video content in NSW are not always working with the most spectacular properties. They are working with the most prepared ones.
Three things separate a professional result from an average one: a vendor who has been briefed with enough lead time to act, a property that has been staged room by room against a clear standard, and an agent who walks the property before the crew arrives.
Use the checklist in this post before every shoot. Save it, share it, and make it part of your standard workflow. When your listing video stops a buyer mid-scroll, the preparation you did the day before is a large part of the reason why.
Not sure what video you need? Use our free Video Project Calculator to get a tailored recommendation and rough estimate in under 2 minutes.
Use the CalculatorYou should brief your vendor at least 48 hours before the shoot, with a written confirmation sent the evening before. A verbal briefing just three days out is largely ineffective. A written summary via SMS or email helps vendors understand specific production requirements in plain language, such as removing personal photographs, clearing horizontal surfaces, confirming light globes work, and ensuring they'll be off the property during filming.
Professional real estate videography uses wide-angle lenses in the 16-24mm focal range that capture entire rooms in a single frame. This means items left on horizontal surfaces—like kettles, toasters, and clutter on kitchen benchtops—become dominant visual elements rather than background details. These items cannot be removed in post-production and will undermine the listing. The same optical properties that make a clear space look generous make a cluttered one look chaotic.
Mow lawns and edge garden beds the day before the shoot, not the morning of. Freshly cut grass is often wet, and disturbed soil and clippings will show up in the drone and wide-angle footage. Scheduling lawn work the day before gives everything time to settle and dry, ensuring clean, professional-looking exterior shots.
You should arrive at the property at least 30 minutes before the crew arrives. This is your final walk-through to confirm all preparation is complete, not to do last-minute preparation. Use your checklist to verify every light is on, all blinds and curtains are open, vehicles are off the driveway, and bins are away. This allows you to address any issues before the paid production time begins.
Closing the toilet lid is the most overlooked bathroom preparation detail and one of the first things viewers notice in footage. Beyond this, it's equally important to clear every toiletry from visible surfaces (vanity tops, shower ledges, and bath surrounds), clean mirrors and shower screens until streak-free, and ensure all vanity and feature lights are on. Bathrooms with mirrors and chrome fixtures are technically demanding and require careful clearing to avoid reflections of clutter and camera crew.
618 Media is a video production company based in NSW, working with businesses, artists, and organisations across Sydney and NSW on music videos, brand stories, corporate video, event coverage, real estate, social media content, and more.
Every project starts with a conversation about what you want to achieve. We handle everything from concept through to final delivery.
Get in TouchFill in your details and a member of the 618 Media team will get back to you personally.
A team member reviews every message personally. No automated replies.
Message received. The 618 Media team will get back to you personally, usually within a few hours on business days.
